University Systems help centre
Web hosting - Faculty and Staff
 Web publishing and hosting
University Systems offers a faculty and staff web hosting service that allows individual homepages for faculty and staff on web.uvic.ca. This service can be used to create web pages, where you can add and maintain content, as well as set permissions. All computing usage at UVic, including individual web spaces, are subject to UVic policies including IM7200 and IM7800. Review the Terms of Service for further details.
Online Services allows you to view, sign up for and renew your available services, including the faculty and staff web hosting service.
Sign up for your individual website
The URL for your website will include your NetLink ID: http://web.uvic.ca/~NetLinkID.
To access your web space, ensure you have:
- a NetLink ID;
- UVic Multi Factor Authentication (MFA)
- a Secure File Transfer Protocol (SFTP) client; and
- a secure Internet connection to the UVic network either on campus, or via VPN.
To add files to your web space, you will need to connect to the web.uvic.ca server using an SFTP client. Once connected, documents that you want to display on your site should go in the www folder.
You may choose to restrict access to your website, since UVic websites are by default available to the public.
More information about creating web pages can be found on the UVic Communications website.
Uploading content to the web.uvic.ca hosting service
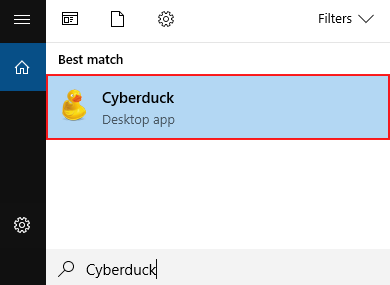
1. Ensure that you have downloaded a Secure File Transfer Client, such as Cyberduck.
2. Launch the File Transfer Client by finding the program in the Start menu (Windows) or in the Finder (Mac).
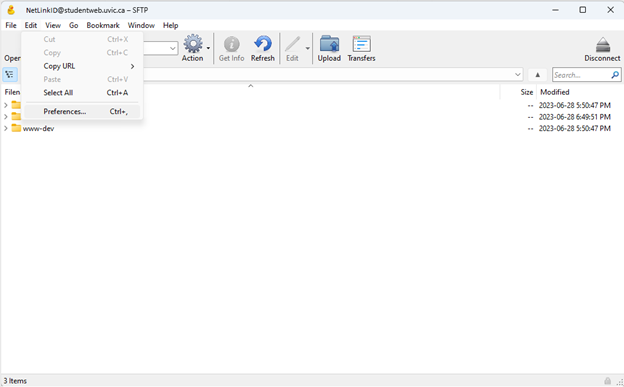
3. The main application window will open. If you are using Cyberduck, first we need to change one setting to prevent getting a Duo MFA prompt each time a file is transferred. This setting may not be required on other SFTP clients.
Go to Edit > Preferences (On a Mac this is under Cyberduck > Settings).
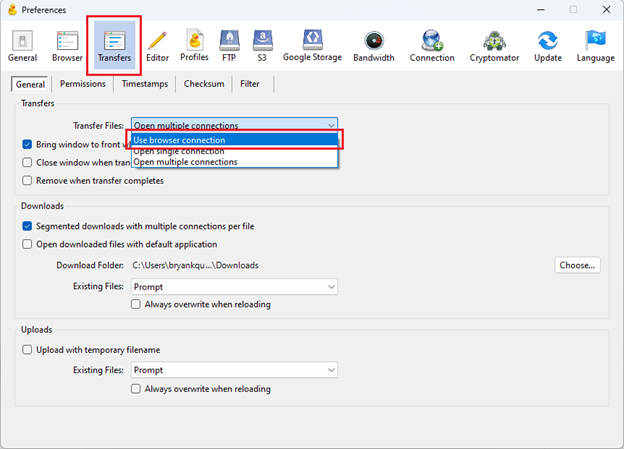
Under the Transfers Tab select "Use Browser connection" in the drop down menu.
Now we can connect to the web space. Click the Open Connection.

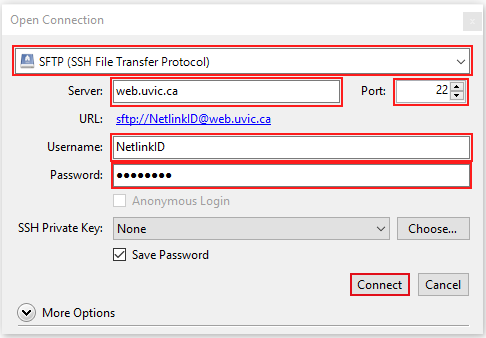
4. The Open Connection window will open. Enter the necessary information in the fields, located near the top of the window:
- Connection Type: From the drop down menu, select SFTP (SSH File Transfer Protocol).
- Server: the server to which you'd like to connect. For Faculty and Staff, the server will be web.uvic.ca.
- Username: your login ID for the server. For web.uvic.ca, your username would be your personal NetLink ID.
- Password: your password for the server. For web.uvic.ca, your password would be your NetLink ID password.
- Port: 22 (22 is the SFTP port).
NOTE: Access to web.uvic.ca is restricted to on campus and VPN networks only.
Click Connect.
5. You will see a host key message, showing the fingerprint for the server to which you are trying to connect. For security reasons, ensure the displayed fingerprint matches the actual fingerprint of the server. Fingerprints for many host at UVic can be found here.
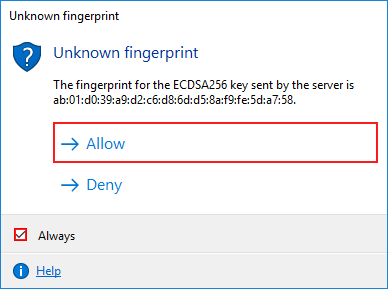
If the pattern in the alert matches the pattern for your host, check the box that says Always to always trust this host, then click Allow.
Alternatively, you can deselect the checkbox and click Allow to trust this key only for the current session.
6. You will recieve a pop-up for Duo MFA authentication if you have MFA enabled on your netlinkID. You can Enter "1" and click continue to recieve the push notification on your device to approve Duo. If you are using a bypass code or other code, you can type it in the Passcode field instead.

7. The files and folders on the server should appear. From here, you will be able to view and transfer files.
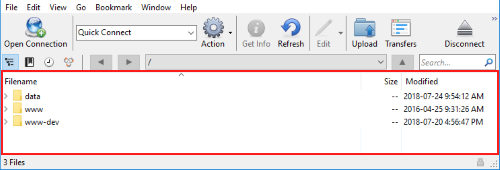
Files and folders related to your web space should go in the www (live site) or www-dev (development site) folder.
If you are recieveing a prompt for Duo MFA each time you transfer a file, refer to step 5 and ensure you have "Use browser connection" selected.