Add column boxes to a page
To add column boxes to a page:
- Navigate to the desired page and click on Edit.
- Scoll down to the Main Content area.

- Click on the green plus (+) icon on the right to add another Content Group. It will be added directly below.

- Scroll down to the bottom of the new content group where you see Page Block Content. To add the column boxes block, click on Choose Block.

- If you just finished creating the column boxes block, you will see it conveniently listed in the history displayed. You can select the radio button beside it and then click on Choose.

- If you don't see your column boxes block in the history, you can click on Browse and navigate to find it.

- Once your column boxes block has been selected, you will see it's path displayed.

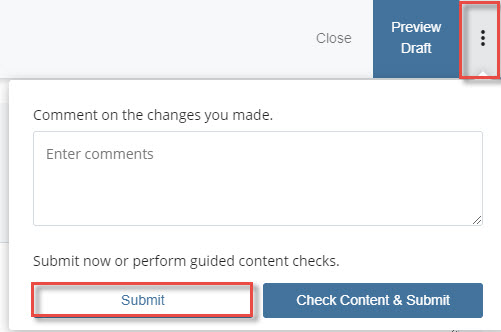
- When you are finished editing the page, click on the ellipsis, and then click on submit.
- You will see that your column boxes have been added to the page.

