Entering and approving online timesheets
Online timesheets (web time entry) enables employees to enter their hours worked from any device - computer, mobile phone, tablet - online, anywhere.
Time entered by employees is routed to supervisors for online approval. Once the timesheet has been approved, it is sent electronically to the payroll department for processing on scheduled payroll runs.
To find out when timesheets must be submitted, please review the web time entry deadlines as these will differ from salaried to hourly and casual employees.
Supervisors who are required to approve time on behalf of their team are encouraged to approve timesheets in accordance with the posted approval deadlines. A member of the payroll team may reach out if your team has submitted timesheets that have not been approved in advance of the pay run, however, it is your responsibility to ensure timesheets are completed in time for your team member to be paid on their regular scheduled pay dates.
If you are going to be away and normally approve your team's timesheets online - please set up a proxy to act in your absence and approve timesheets on your behalf. You can set up or update your proxy online.
Do you have questions about the submission of your timesheet, or need help with errors, approvals, or other time sheet related issues? Please send an email for assistance.
Other Resources
- Do you want to start doing online timesheets (web time entry)? Please contact us to find out how.
- Are you currently using online timesheets and have more employees to add to your roster? Complete a new hire form and submit to payroll for processing.
- Does your team appear to have a mix of payroll entry types? To confirm who is currently set up for online timesheets (web time entry), you can review the FAST HR report - 'Time Entry Method' - to see how your team is currently set up for time entry.
Time entry and approval instructions
Access your time sheet in
online tools. The link in online tools will take you to the new
time reporting interface through the Employee Dashboard.
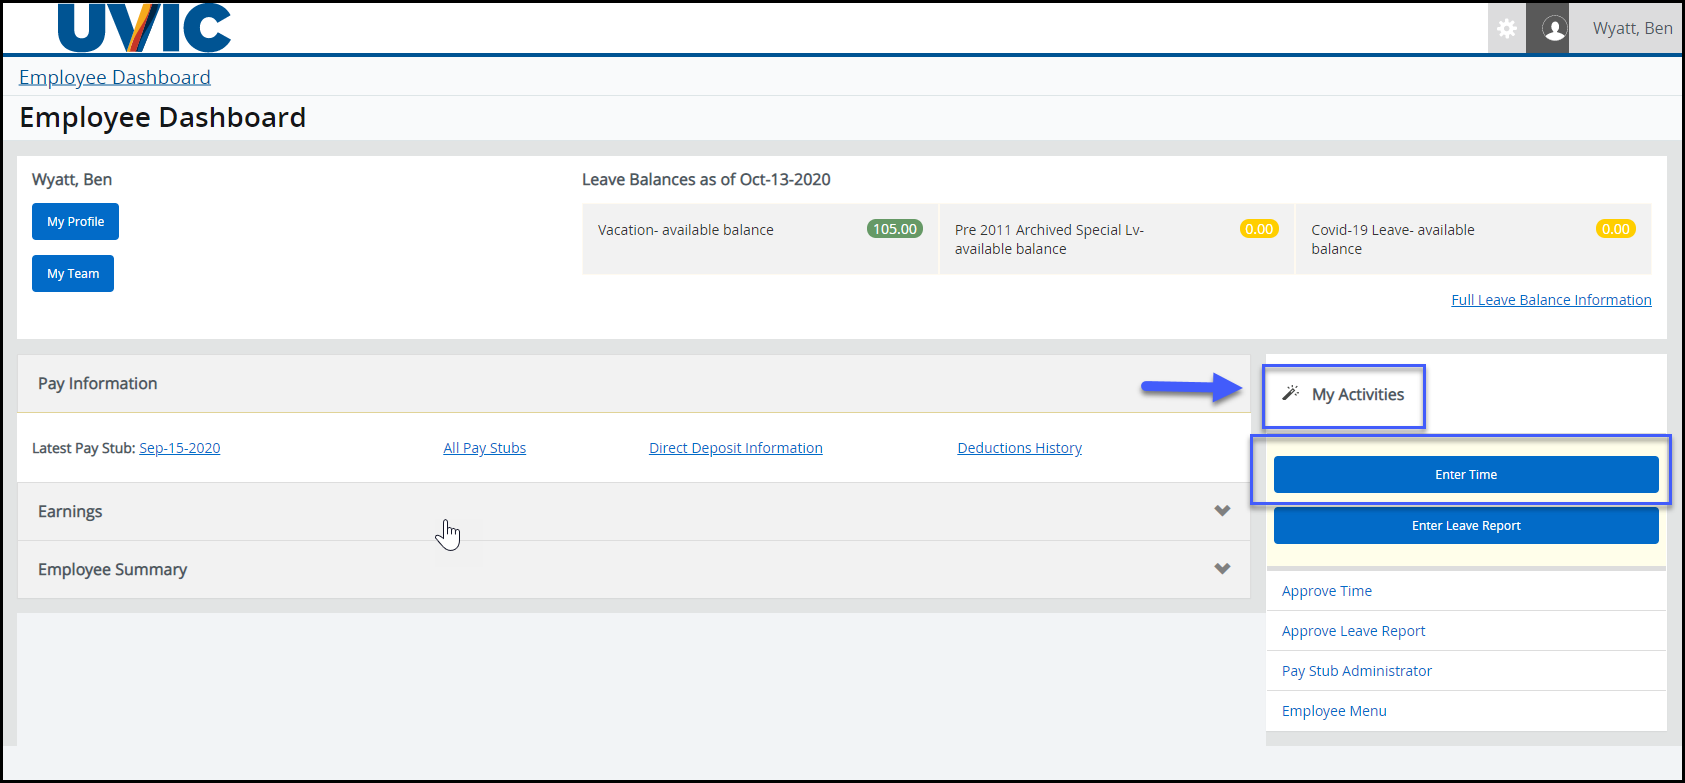
- Under 'My Activities'
- Choose 'Enter Time'

- Locate the pay period and position you are recording your hours worked for
- Choose 'Start Timesheet'
- Your monthly leave report will be generated
When your timesheet opens, you can view information like who is going to approve your hours and insert any comments that may be necessary for your supervisor.
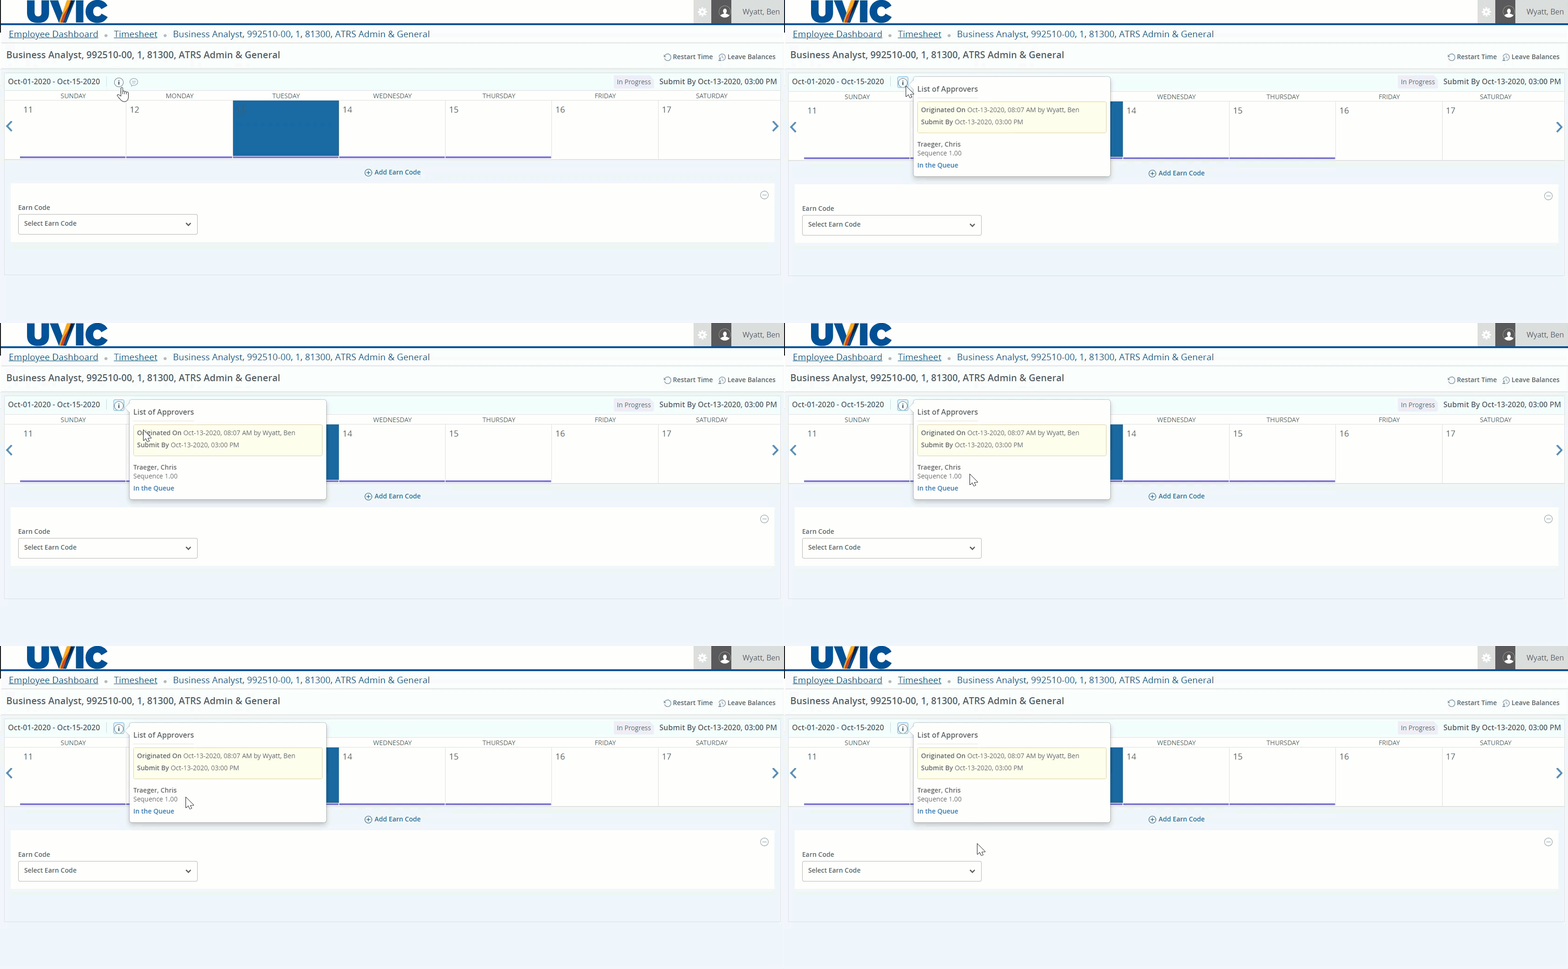
To see who is going to approve your time entered:
- Click on the information button next to the pay period date

- The approver information will appear in a dialogue box
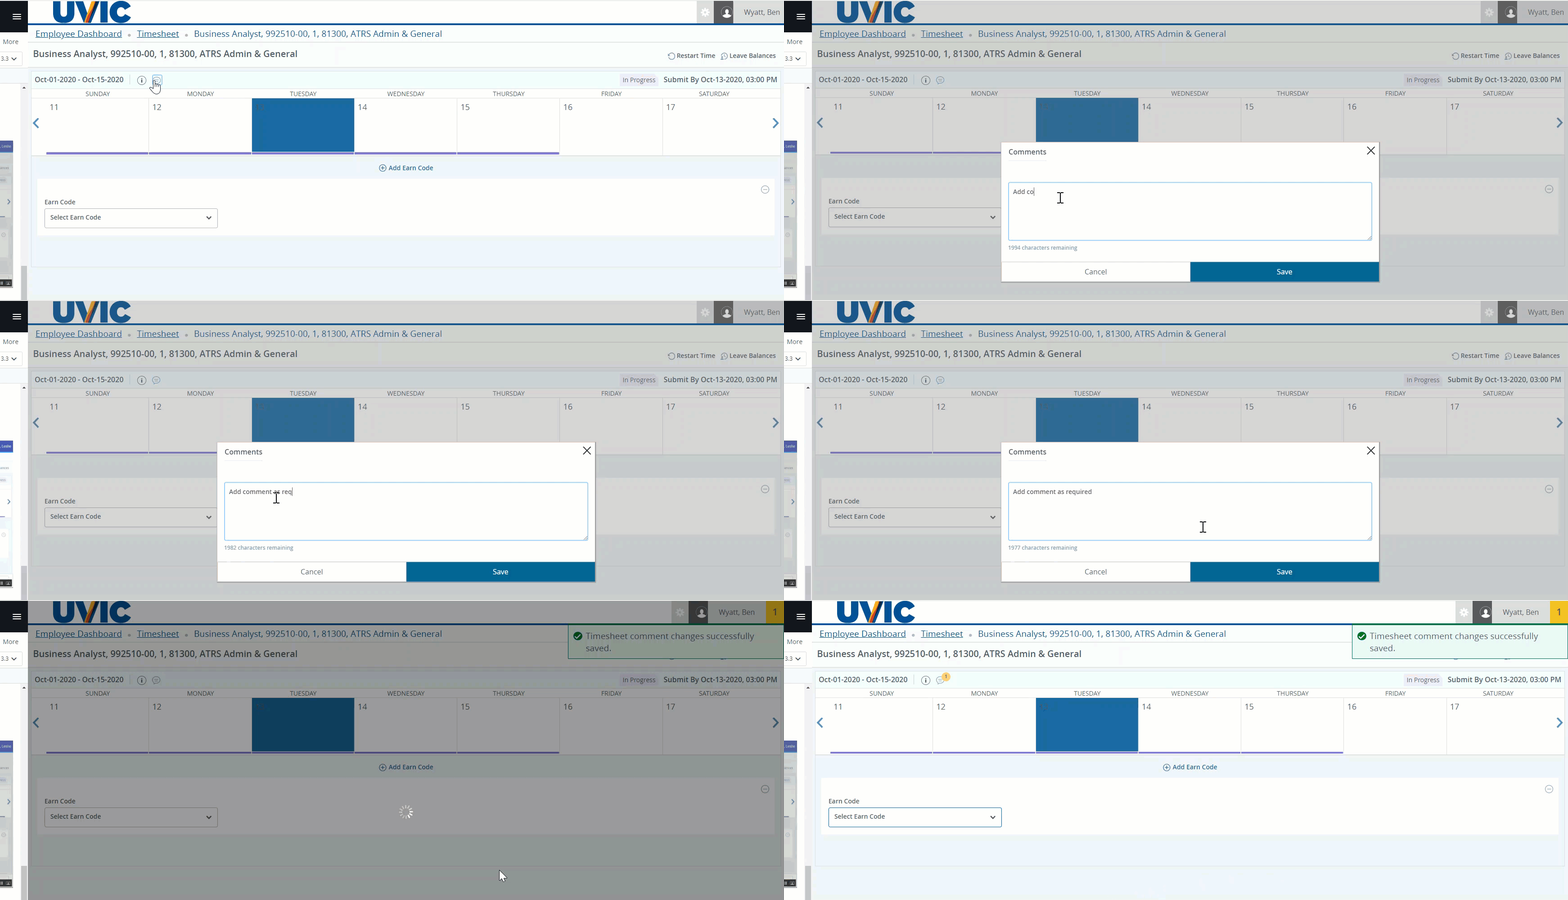
To leave a comment on your time sheet:
- Click on the comment bubble
- Comments must be entered before submitting your time for approval
- Your approver will be able to read these comments when approving your time

- Enter your comments as desired
- Press save
To enter your timesheet hours:
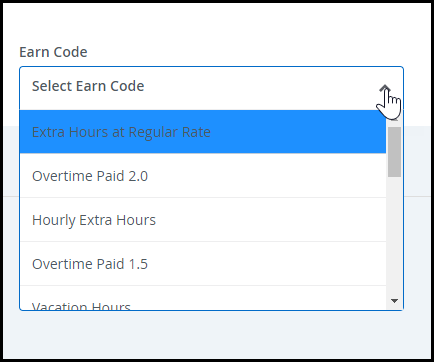
- Choose appropriate earn code from drop down list
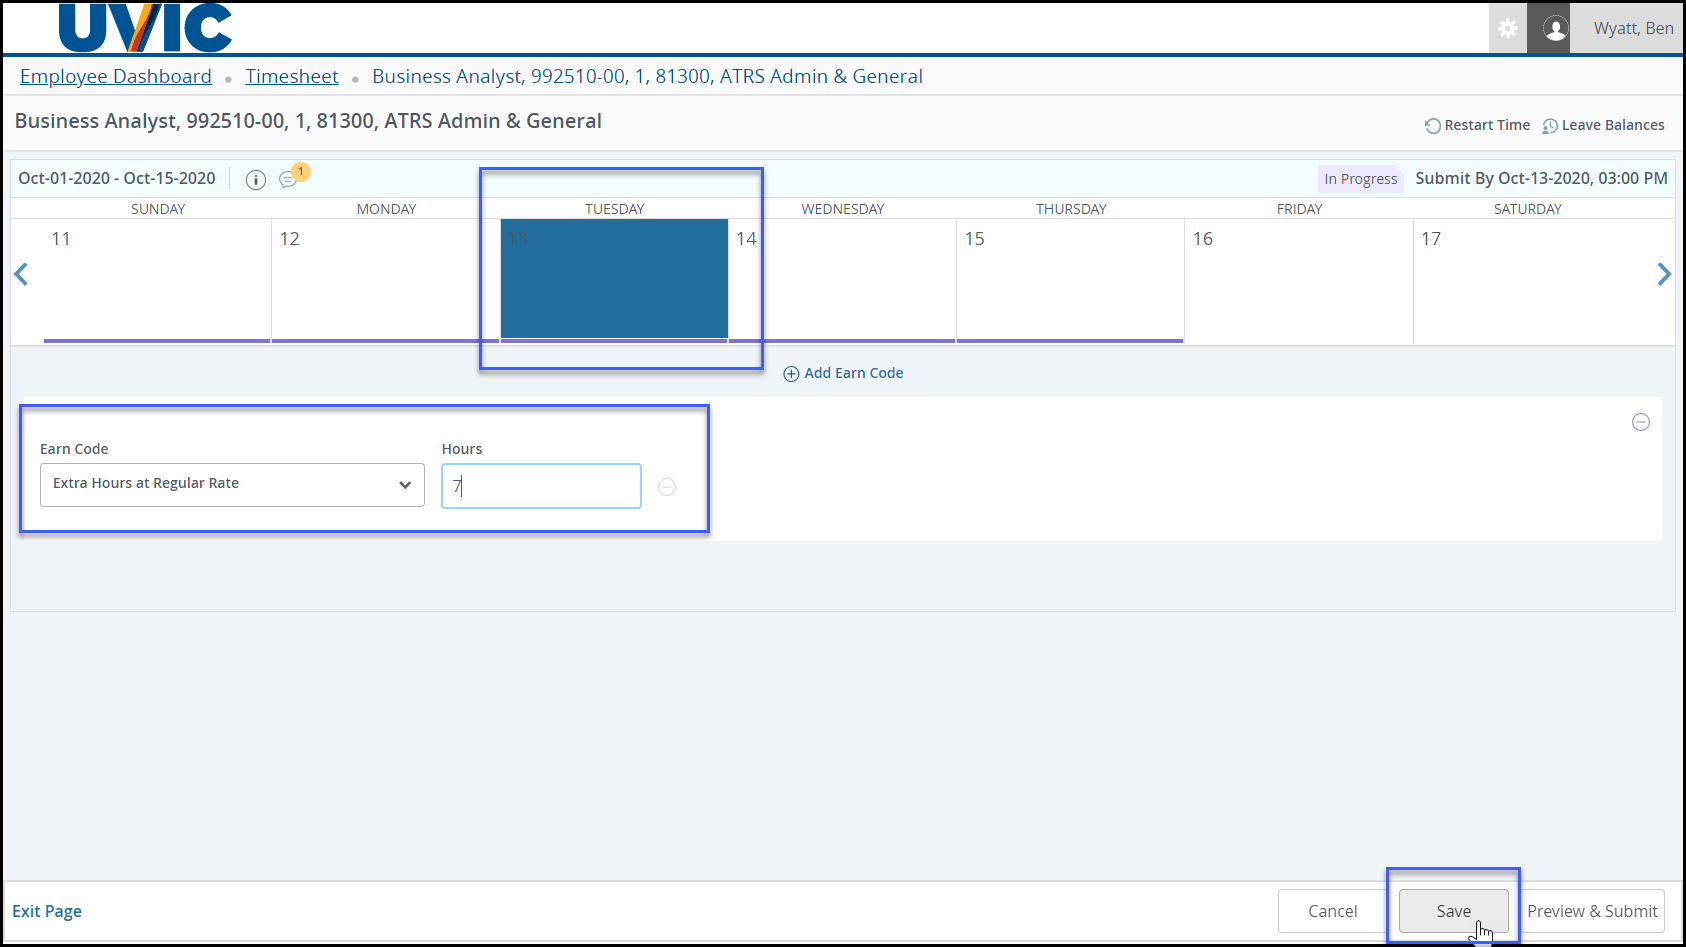
- Choose correct start date for hours (the date on the calendar should be coloured in)
- Enter number of hours worked
- For CUPE 951/917 casual/hourly employees, there is an option to select a shift
- Press save
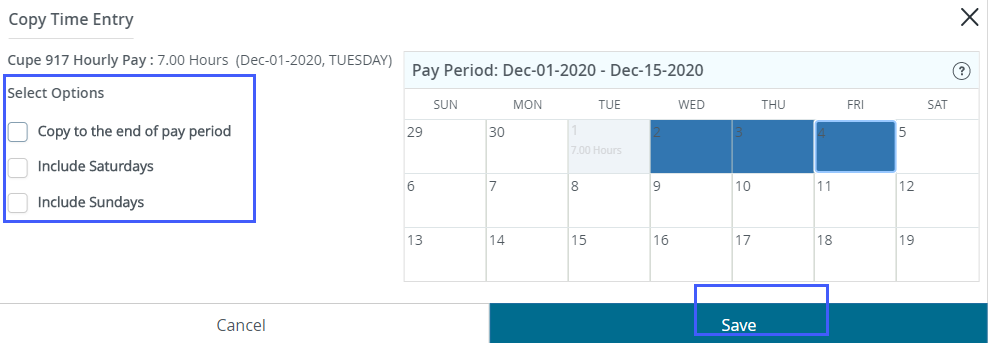
- You can copy the same earn code to multiple days by pressing the copy button:

- A new window will open with multiple options to copy your timesheet:

- Select option from list if appropriate
- Copy to the end of pay period - will automatically copy
- If the options do not apply, you can manually select the days you want to copy your entry to
- Click in each date box on the calendar that you want your entry to be copied to
- Press 'Save '
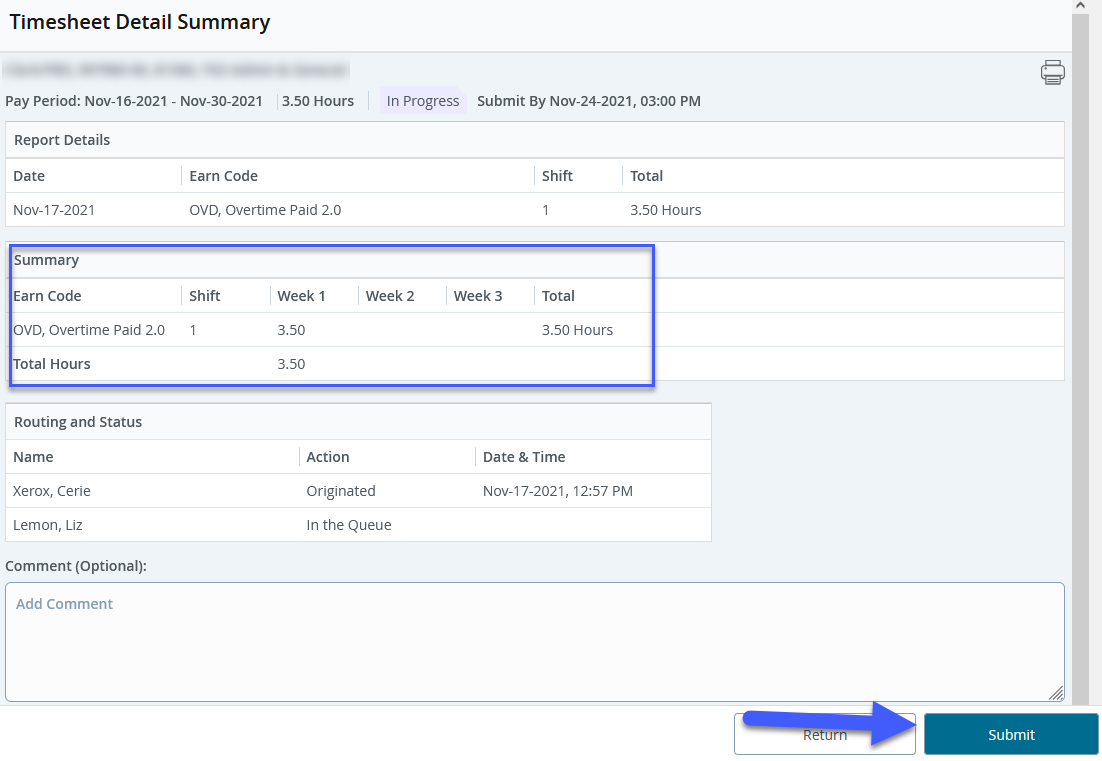
- To preview the hours you have entered, click 'Preview and Submit'

- If you are satisfied with your entries, click 'Submit'
- You will receive a notification that says your submission has been successful. It will be routed to your supervisor for approval.

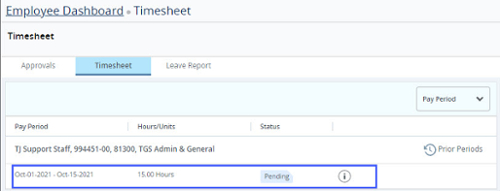
- You will see the pending submission by navigating back to your list of timesheets
To recall your timesheet if submitted in error
- If you submitted your timesheet in error, you can recall the timesheet, add or change hours entered, and resubmit
- Navigate to the timesheet you wish to recall and click anywhere in the row to open that timesheet
- Confirm this is the timesheet you wish to recall, click the 'Recall' button in the bottom right corner of the screen
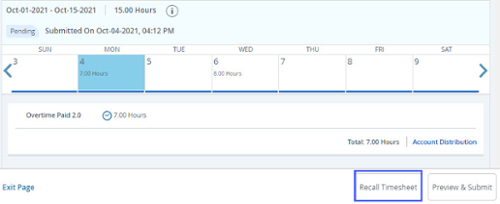
- You will see a green confirmation in the top right corner of the screen

- You can now edit and resubmit this timesheet
- Note that a timesheet can only be recalled before the timesheet due date
Access timesheets for approval in
online tools. The link in online tools will take you to the new
time approval interface through the Employee Dashboard.
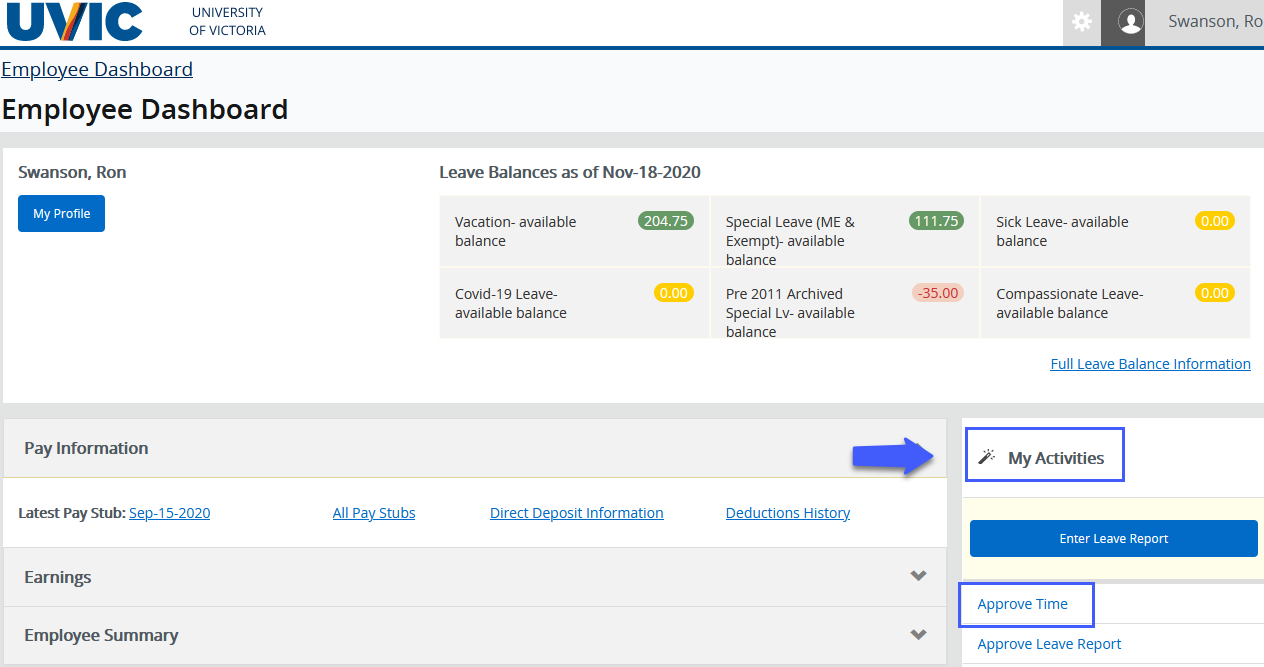
- Under 'My Activities'
- Choose 'Approve Time'
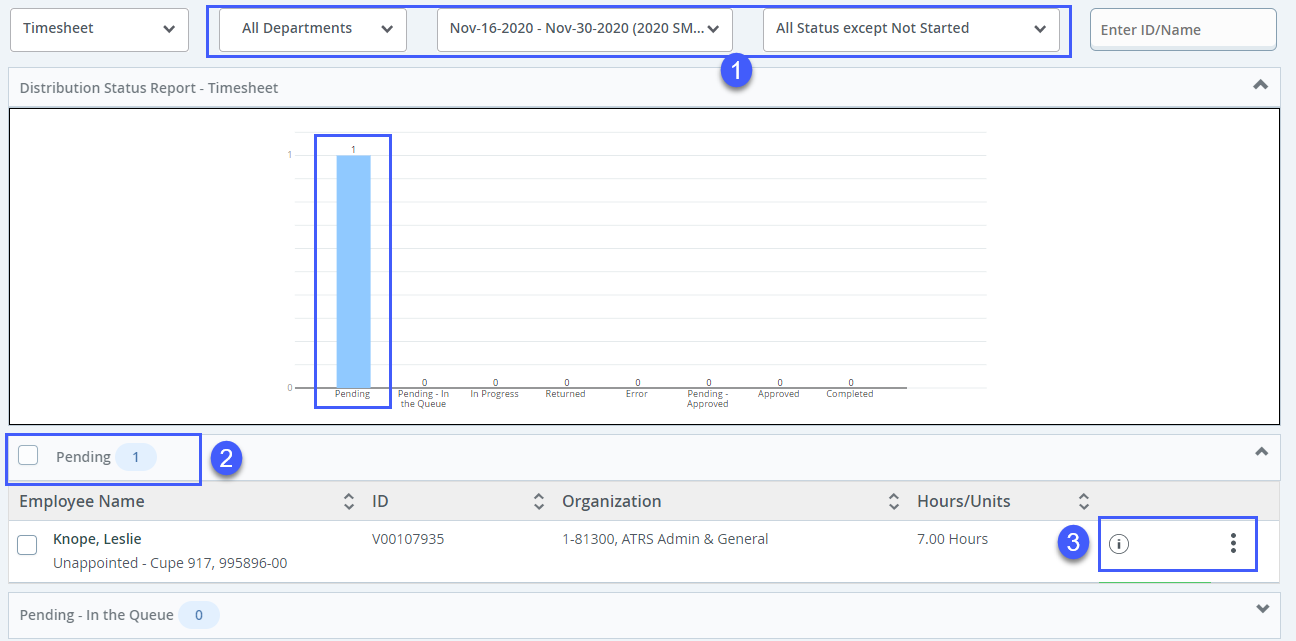
1. The drop down menus along the top section of the time approvals page allows you to choose:
- Departments to approve (if you are responsible for approving more than one department)
- The period for which you need to approve time
- The status of your teams' timesheets
The bar chart will depict various timesheet status'
- Clicking one of the bars will drill down into that specific status category
The various status' and their meanings are:
- Pending: The timesheet has been submitted for approval and is awaiting approval
- Pending - In the Queue: If the queue has more than one approver and the timesheet has not been approved by the person earlier in the queue than you, you will see the report as pending - in the queue
- In Progress: Your team member has started their timesheet but has not yet submitted it for approval
- Returned: The timesheet has been returned to your team member to revise and resubmit for approval
- Error: When a transaction has an error and goes into 'Error' status a message will be displayed to the user. The system will automatically return the transaction to the status it was in when it encountered the error.
- Pending - Approved: If the queue has more than one approver and the timesheet has been approved by one person, but not the other, you will see the report as pending - approved.
- Approved: The timesheet has been approved! You're done!
- Completed: Approved timesheets will move to a completed status at the end of a specified period
2. To approve timesheets:
- Choose the status or category of timesheets that you would like to review and approve
- Click the bar chart to be taken to all timesheets with the same status or
- Scroll down to see the timesheets submitted by your team
3. Click on the ellipsis in the right side of the screen to preview the timesheet details
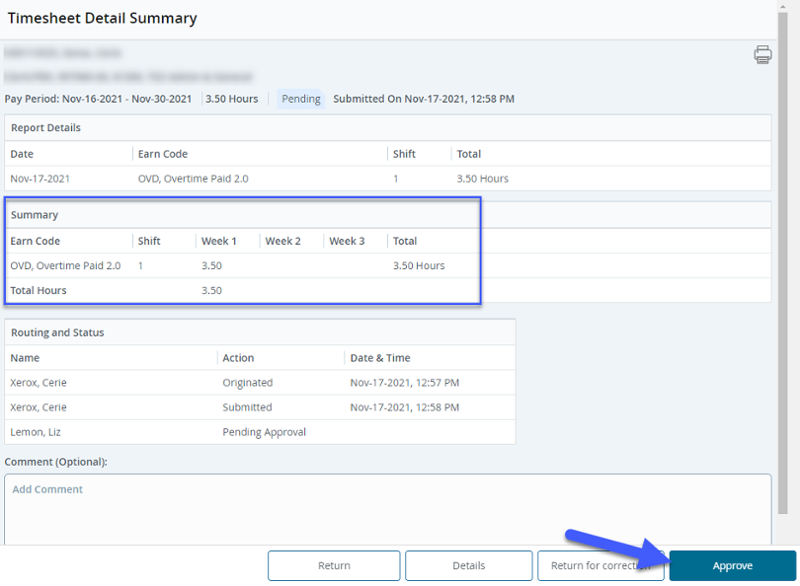
- Review time sheet (For hourly/casual CUPE 951/917, review the shift differential) details and click the 'Approve' button; or
- If changes are required, enter a brief comment describing changes required in the comment box and then click the 'Return for correction' button.
Proxy timesheet approvers
The employee self service time approvals module allows a proxy to be set up to approve timesheets on behalf of an approver.
Allow someone to approve timesheets as me (proxy setup)
- Access timesheets for approval via the employee services section of online tools. This link will take you to the new time approval interface through the employee dashboard.
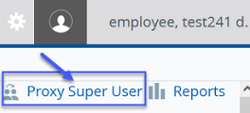
- To assign a proxy to approve employee timesheets on your behalf, click on 'Proxy Super User' at the top right of the screen
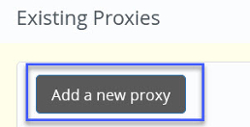
- Scroll down the screen to the 'Existing Proxies' section and click 'add a new proxy
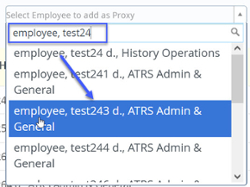
- Click on the 'Select Employee to add as a Proxy' field and type in the name of the person to add as a proxy. Select the name in the search results.
- The employee's name will now show in the list of existing proxies
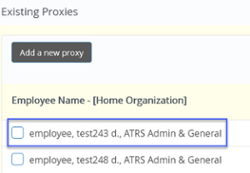
- You can assign more than one proxy approver if required
- If you do not find the name of your proxy in the list, fill out the Human Resources System Access form
- Fill in the required contact information and check the box next to 'Web Time Entry'

- Enter the org(s) and check the 'Proxy' and 'Privacy policy' boxes, then click 'Submit'
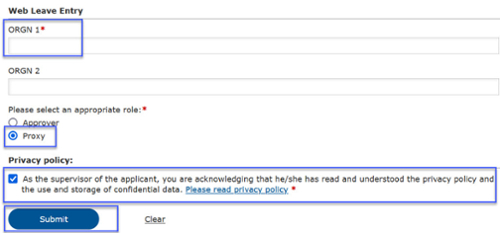
- Proxy set up is typically completed within 24 hours
Approve timesheets for someone (act as a proxy)
- From the timesheets for approval screen, click on 'Proxy Super User' at the top right of the screen

- Scroll down to the 'Act as a Proxy for' section
- Click on the drop down box in the 'Act as a Proxy for' section
- Select your name from the list
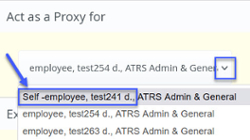
- Click 'Navigate to Time & Leave Approvals application' in the bottom right corner of your screen

- You will now see that you are in the timesheet approvals screen and the message that you are acting as a proxy is gone


