Entering hours (keying) in Department time entry
Department time entry resources:
- About Banner 9
- Keying hours
- Approving hours
1. Accessing department time entry
The time entry screen is in the Banner system and can be accessed using a modern browser. You must be on campus or on the Remote Access (VPN) system to access Banner.
Access Banner
- If you have not already signed in to UVic, then you will be prompted for your username and password.
- If you do not have access to the Department time entry screen, and your team is setup for Department time entry, then your supervisor can request your access through the HR system access form.
- If your team has not been registered for Department time entry, please contact payroll@uvic.ca requesting a consultation on online time entry.

Open the PHATIME form
- If you have multiple time entry options, select the PHATIME item
- Alternatively, you can type in PHATIME in the search box and press enter.
2. Selecting a set of time sheets
Once you are in the PHATIME form, you will need to select the set of time sheets that you would like to fill out.
Fill out the time sheet selection form
Fill out the following fields:
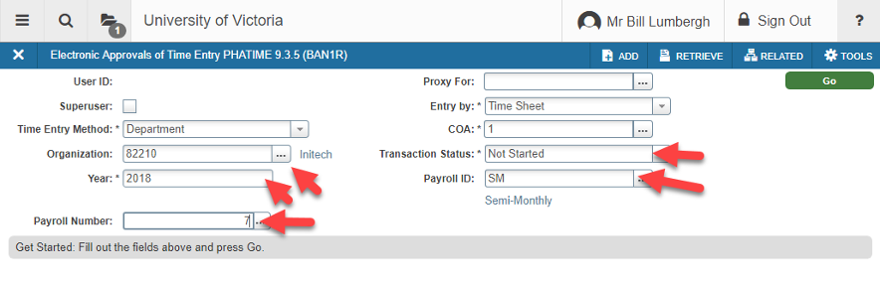
- Time Entry Method: Select Department for Department time entry
- Organization: The time sheet ORGN code that your employees are setup with. This is often, but not always, the ORGN code from your FAST account (FOAPL) code.
- Transaction Status: The transaction status helps filter the time sheets based on where they are in the time approval process.
- Select Not Started if you are looking for time sheets that you have not yet actioned
- Select All except Not Started to get the time sheets that are in progress
- Year: The current calendar year, or the year of the payroll you want to look at
- Payroll ID: Either SM or SA depending on the Payroll that you are entering time for. Most casual employees are on the SM payroll
- Payroll Number: The payroll number that represents the pay period that you are entering time for. The payroll calendar contains the dates of each payroll and deadline.
- NOTE: Once you enter a Year, ID, and Number, then the pay period will appear to the right of the Payroll Number entry box
- COA: The Chart of Accounts or COA field should always be set to "1" at UVic
- Entry By: Selects the type of time entry. For Department time entry, this should always be "Time Sheet"
- Proxy For: Can be used to act as another user. By entering the Netlink of a user you are authorized to proxy for in this field, your actions on the timesheets will be based on their permissions.
"Extract" time sheets
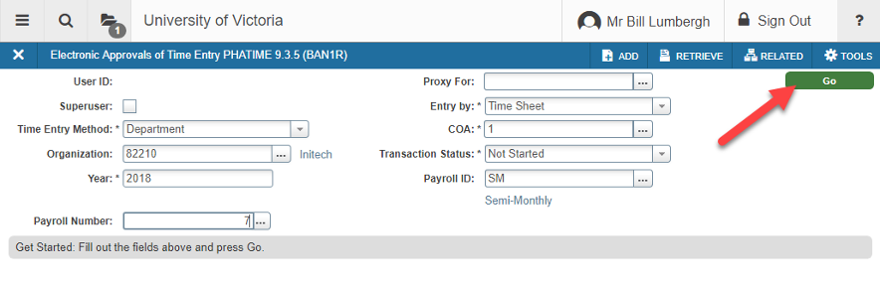
- Press the green "GO" button on the upper right of the screen or Alt-PageDown to go to the "Jobs" area.
- A status box will display the state of your time sheets. It can contain a number of messages:
- Extract Process - Do you want to extract time to begin time entry?

-
- Select "Yes" to extract time. Extracting timesheets is like placing the time sheets for your employees on your desk. Once you have "extracted time" you now have those time sheets on your desk and they are not available for anyone else to enter. The only way another user can also work on those time sheets is by entering your Netlink in the "Proxy For" field, and effectively operating as you.

- Select "Yes" to extract time. Extracting timesheets is like placing the time sheets for your employees on your desk. Once you have "extracted time" you now have those time sheets on your desk and they are not available for anyone else to enter. The only way another user can also work on those time sheets is by entering your Netlink in the "Proxy For" field, and effectively operating as you.
Errors and issues
- Extract errors
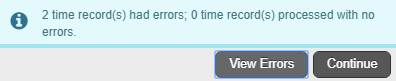
- When extracting time sheets there can be errors with specific jobs. These can be viewed by selecting the "View Errors" button when warned or by using the "Related" menu during time sheet entry.
- Warning Pay Period not open for Time
 OR
OR

- You can only enter time for a pay period during the period and before the payroll deadline has passed. If you have entered invalid information or incomplete information you wil recieve the Error, and not the Warning
- No Records Found

- You or your team may not be setup for department time entry, or the "Transaction Status" that you selected has no records.
3. Selecting a time sheet
The time sheet list lets you select the job (person+position) that you want to record hours against.
About the time sheet (Jobs) listing
The time sheet listing shows a row for each job in the specified organization (ORGN) that is setup for time entry for the period that you have specified. In other words, there is a row for each time sheet.
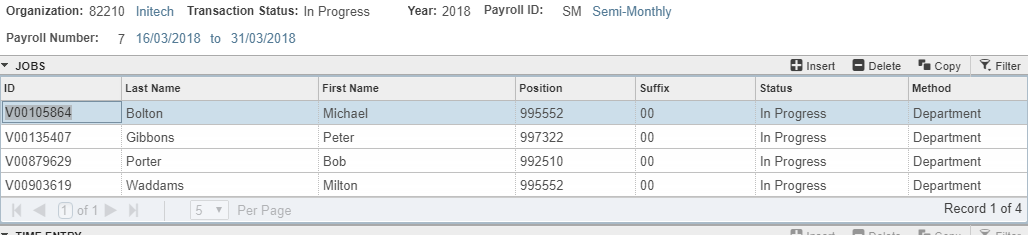
Time sheet fields
- ID - The V-number that represents the employee
- First and last name - The employee's first and last name
- Position - The position number that the person is in
- Suffix - The position suffix can be viewed as part of the position number, one position number with 2 suffix's represents two positions, however; suffix's other than 00 are commonly used as additions to a position.
- Status - The status of the time sheet. Time can be entered if it is set to "In Progress" or "Return for Correction". Other status' include:
- Pending (waiting for approval)
- Approved (already approved)
- Completed (approved and paid for)
- Return for Correction (approver has returned the time sheet)
- Cancelled (...)
- Not started (Not yet extracted)
- Method - This should read "Department" as you are doing Department time entry, but can read "Web" if you are doing a mix of Department and Web time entry
Note: Sometimes you will have a person with multiple time sheets. This is because they have multiple Jobs (person+postion=job). Look for the correct position number and suffix to log your hours against.
Where is the time sheet I want?
Sometimes you cannot find the time sheet that you want to log hours for. Again, there are a few common causes:
- It's on the next page
- Your time sheet may be on the next page. Use the paging controls to see more, or to move between pages.
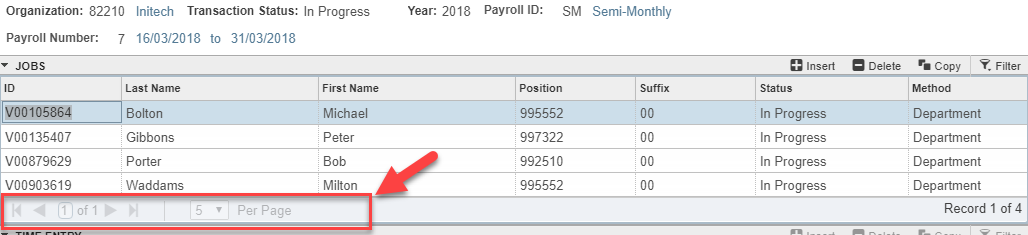
- Your time sheet may be on the next page. Use the paging controls to see more, or to move between pages.
- The job is on another pay run
- Your employee may have multiple jobs, and as such even though they are casual for you, they may be salaried in another position and on the SA payroll. Try switching SM to SA in the Payroll ID field or vice-versa.
- They don't have a job, or it is not setup
- The Current Jobs report in FAST HR provides a listing of jobs in the ORGN that you have access to. In this report there is a column for "Time sheet/Leave Org". This is the ORGN code that the time sheets are under. If the job you are looking for is not available, have you requested that it be setup?
- Even if the time sheet ORGN is correct for a job, it will need to be setup for Department time entry. Send an email to payroll@uvic.ca with the person, and the PHATIME time sheet selection parameters if this seems to be the case.
- The filter is specifying a status
- If the filter is set to "In Progress", "Approved", or any other specific status, a time sheet in another status will not be displayed.
- Try selecting a Transaction Status of "All", or "Not Started"
Select a time sheet
To select a time sheet, you can:
- Click on the timesheet that you would like, then on the earnings field in the hours
- Select a row and click the Next Block down arrow in the lower left part of the screen, or
- Select a row and press Alt-PageDown on your keyboard
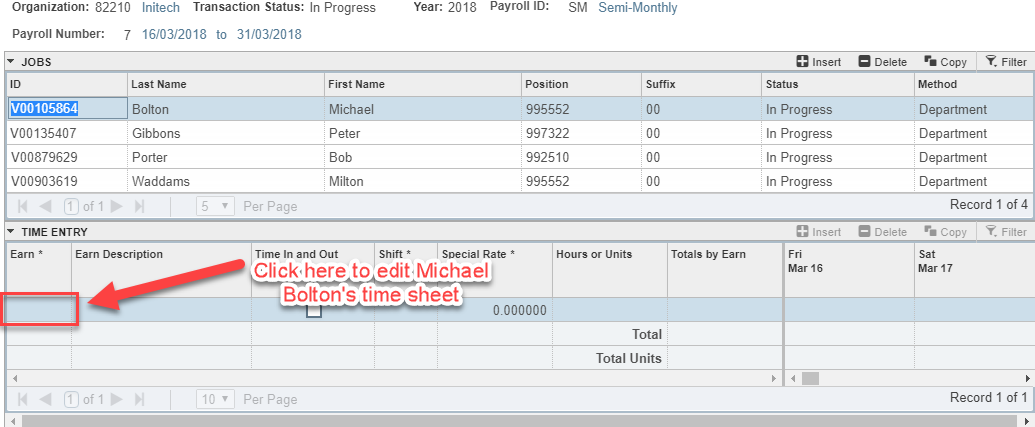
4. Entering hours
Once a time sheet is selected, you can key hours under the applicable earning codes.
Selecting an earn code/type
To start a time sheet, and select a type of earning to key, click on the first row in the earning column under the "Time Entry" area.
You are able to key the earn code if you know it.
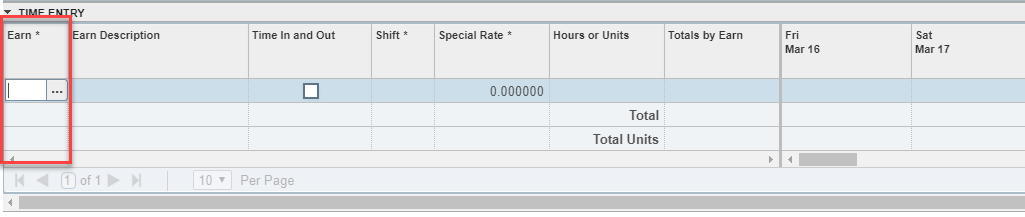
If you are not sure what earn code to use, you can click the [...] button and a dialogue box will appear with a listing of earn codes, their descriptions, and whether you need to provide a rate (S) or not (R).
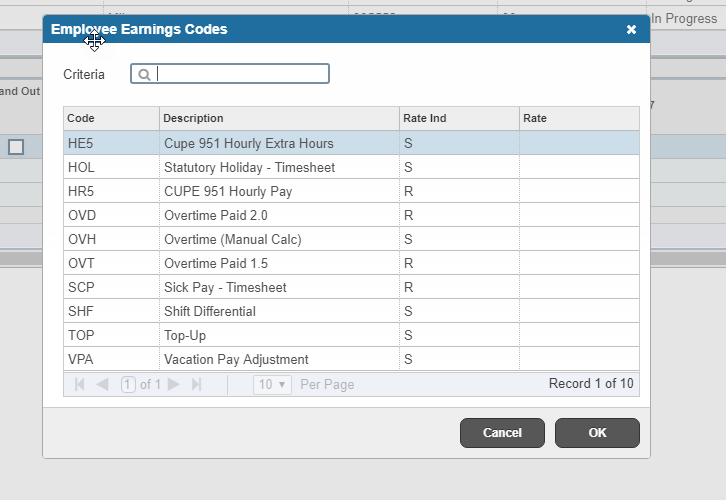
If your earn code requires a special rate to be keyed, then you can select the special rate column in the row and enter the rate that the employee will be paid at.
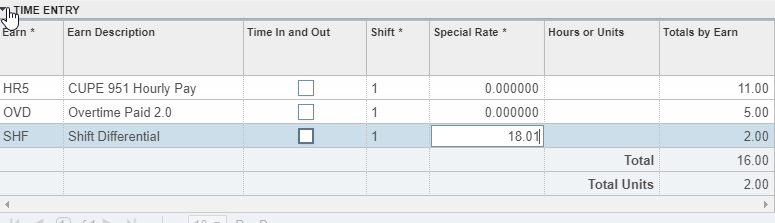
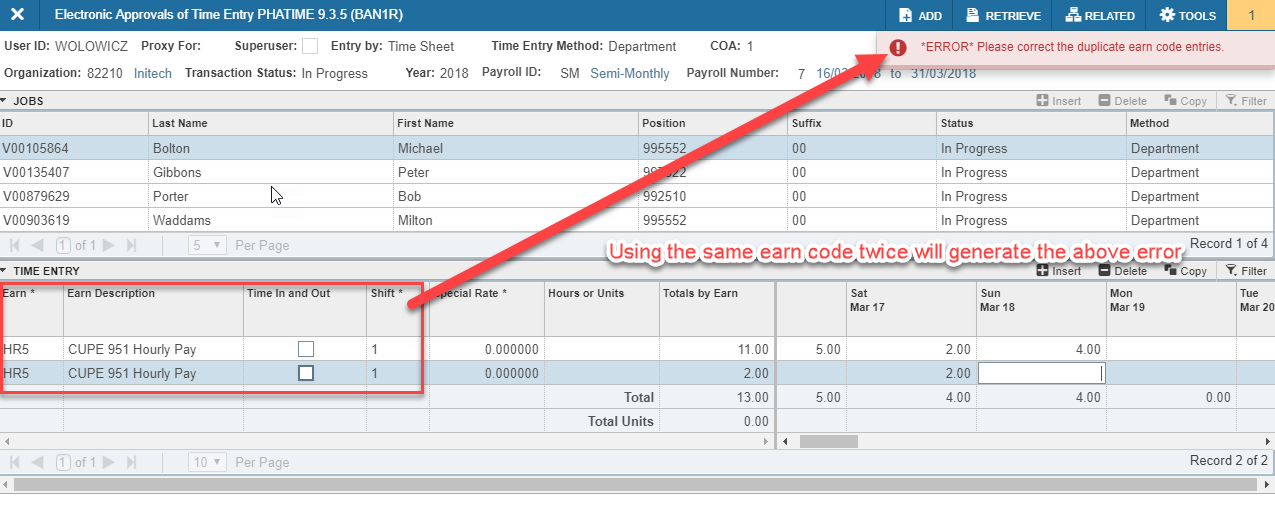
Once you have selected an earn code, the earning description will populate and the shift will populate and select. If you have multiple lines of the same earn code, make sure to increment the shift number for each one. If all of the shift numbers are the same, the Payroll will produce errors.
Note: You can use the shift field to autmatically calculate shift differential for CUPE 917/915 hourly/casual staff
Note: Each earning has a different meaning and should be used appropriately. Most normal hours should be keyed as the Regular rate. Any overtime hours should be keyed with the appropriate overtime rate.
Entering hours
Once your earning, shift and any special rate have been selected, then you can key hours under any of the days in the pay period. This can be done by using the Tab key or using your mouse to move from day to day.

If you have time from a previous period that has not been recorded, you can enter it all on one day and make a note using the Comments tool.
Saving, and adding another earning
It's good to save frequently, you can press SAVE in the lower right corner, or press F10 to save.
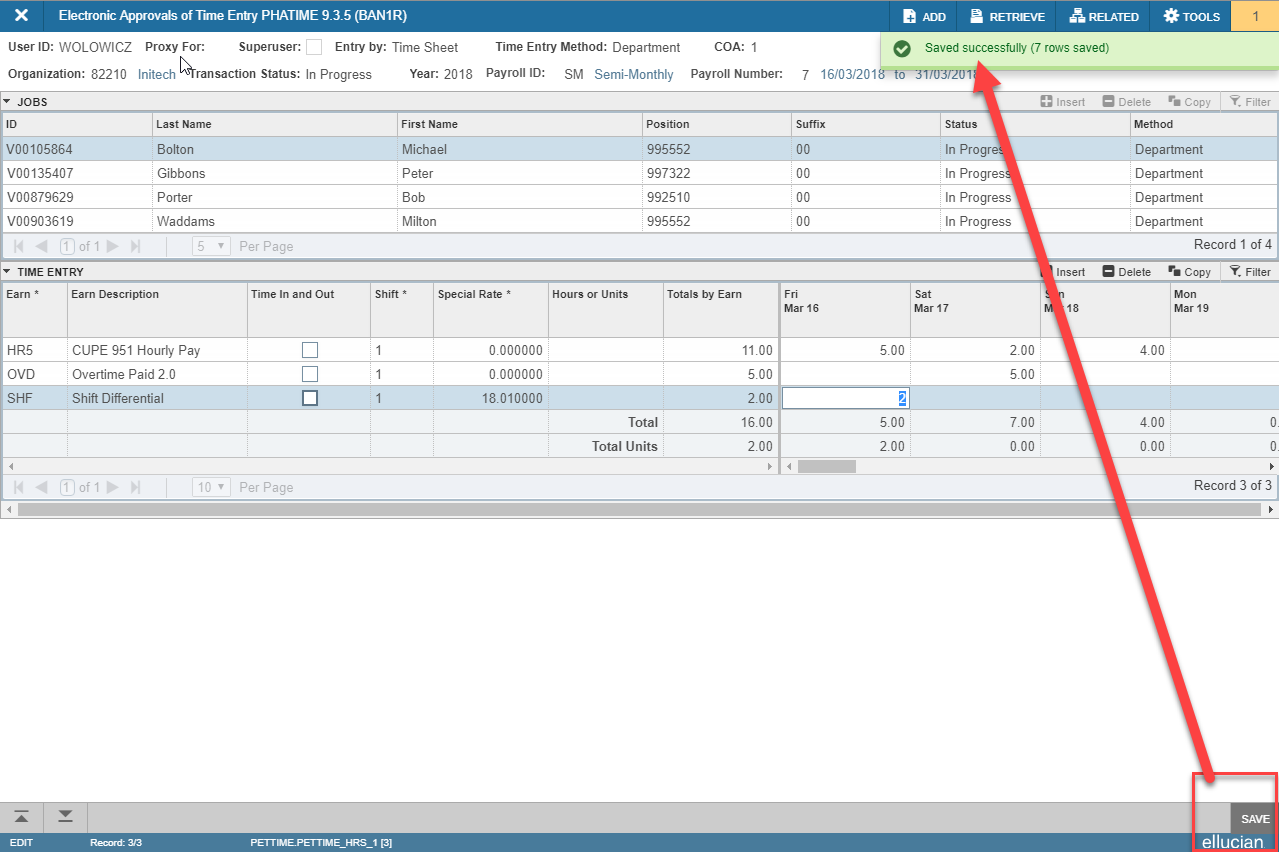
To add another earn code, you can press the down arrow, or press the [+]insert button above the hours area.
5. Options
Other menus and options for time sheets
Adding a comment
To add a comment to a time sheet, while you are in that time sheet, select "Tools" from the top right, and then scroll down to "View or Enter Comments" menu item.
Once selected there is a box with the previous comments, and a place to enter your own comments. Once complete, press SAVE in the lower right corner, or press F10. This will save the comment and you can exit the comment section by going back to the tools menu and selecting "Time Entry Data".
Comments are an excellent way of letting the approver and payroll know of any irregularities. A good rule of thumb is to leave a comment if the hours on the timesheet exceed 35 without overtime being paid. This might be due to a payment for a previous time period, or a payout based on other information.
Changing the account to be charged
By default, jobs are setup to use a default account(s). Any earnings keyed will come out of that account, unless you perform a "labour distribution override".

Once you have keyed a day of hours, select the hours that you want to override, then select "Tools", and "View or Override Labour Distribution".
The Override section will let you override a number of hours less than or equal to the hours that you have keyed on that day, to that earn code. Note that the shift, earn code and specific day are specified.
Once complete, press SAVE in the lower right corner, or press F10. This will save the distribution and you can exit the comment section by going back to the tools menu and selecting "Time Entry Data".
6. Submitting hours
Now that you have keyed your hours in the time sheet, and it's all saved (right?), now it's the easy part, from the Time Entry section select the "Tools" menu and "Submit time for Approvals". That time sheet will then be routed to the approver.
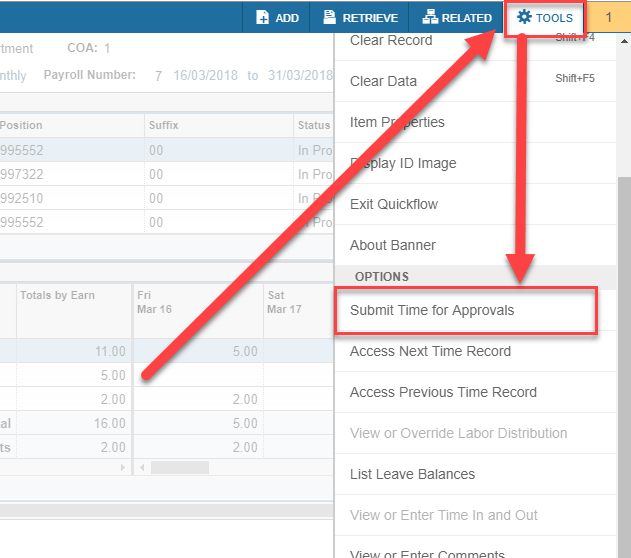
Note: You need to submit each timesheet for approval.