Entering and approving leave reports
On the first day of each month you will receive an email to submit your monthly leave report. You are encouraged to complete this report within 7 days of your email reminder - this monthly submission is required even if you do not have any hours of leave to record. In this case, you will submit a leave report with 0 hours recorded.
Your leave report is submitted to your supervisor and once it is approved your leave balances are automatically updated where applicable.
Supervisors who are required to approve leave on behalf of their team are encouraged to complete this task on a monthly basis. At certain times of year the Human Resources office may contact you to approve any pending leave reports that could impact year-end processes.
To check on any outstanding leave reports, you can review the FAST HR report - 'Leave Approval Status'. Leave reports with a status of "Pending" will require action (approval).
Do you have questions about the submission of your report, or need help with errors, or other leave related issues? Please send an email for assistance.
Entering your leave report(s)
- Access your leave report from online tools. The link in online tools will take you to the new leave reporting interface through the Employee Dashboard
- Under 'My Activities' choose 'Enter Leave Report'

- Scroll to find the month you are recording your leave report for
- Choose 'Start Leave Report'
- Your monthly leave report will be generated

- If there is more than one approver for your leave report, select the person you would like to approve your report from the list and click 'Confirm'

- When your leave report opens, you can view information like who is going to approve your report, insert any comments that may be necessary, and review your leave balances.
To see who is going to approve your report:
- Click on the information button next to the leave report date

- The approver information will appear in a dialogue box
To leave a comment on your leave report:
- Click on the comment bubble
![]()
- Enter your comments as desired
- Press save
To view your leave balances before submitting your report:
- Click the 'Leave Balances' Button
![]()
- Scroll through list of available balances

To enter your leave report hours:
- Choose appropriate leave code from drop down list

- Choose correct start date for leave (the date on leave calendar should be coloured in)
- Enter number of hours taken
- Press save

You can copy the same leave code to multiple days by pressing the copy button:
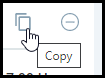
A new window will open with multiple options to copy your leave report:

- Select option from list if appropriate
- If the options do not apply, you can manually select the days you want to copy your entry to
- Click in each date box on the calendar that you want your entry to be copied to
- Click 'Save'

If you entered your leave against the wrong leave code, this leave entry will need to be deleted and the correct leave code will need to be added.
- Click the delete button.

- You will be asked to confirm that you want to delete the leave record. Click 'Yes'.

- To add a new leave code, click 'Add Leave Code'.

- If you are finished your leave report, click 'Save'.

To preview the hours you have entered, click 'Preview and Submit'

If you are satisfied with your entries, click 'Submit'

You will receive a notification that says your submission has been successful. It will be routed to your supervisor for approval.

You will see the pending submission by navigating back to your list of leave reports
Approving your team's leave report(s)
Access leave reports for approval in Online tools. The link in online tools will take you to the new leave approval interface through the Employee Dashboard.
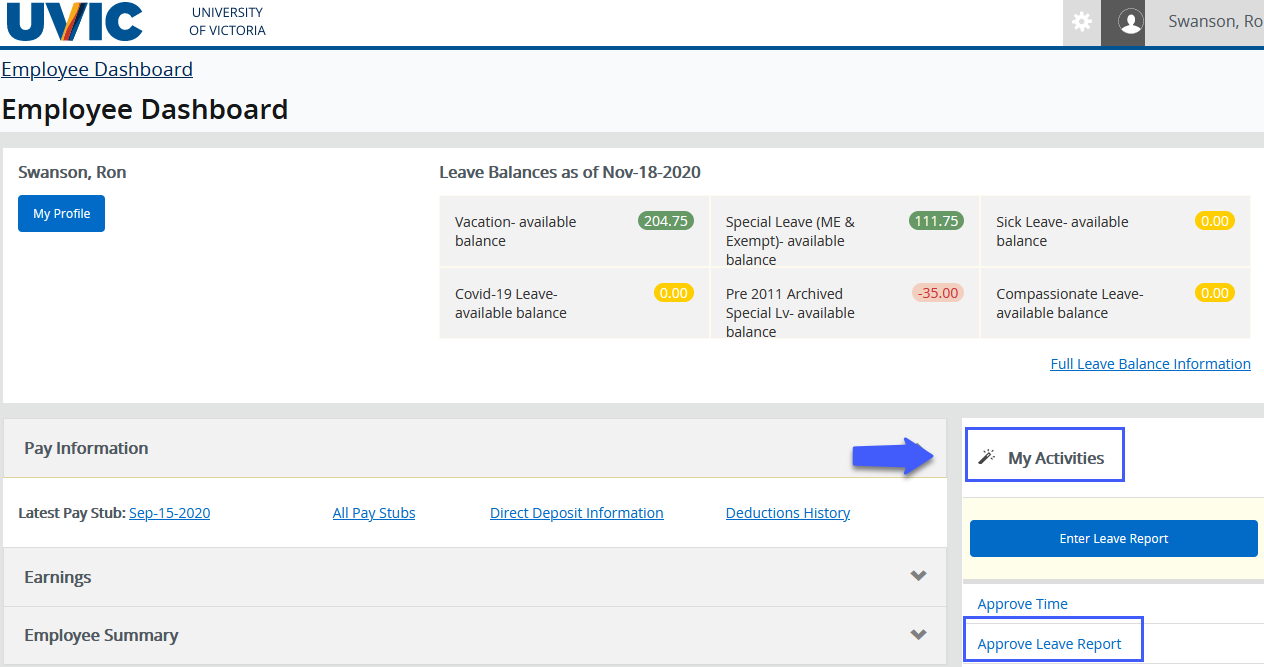
- Under 'My Activities'
- Choose 'Approve Leave Report'
 The drop down menus along the top section of the leave report approvals page allows you to choose:
- Departments to approve (if you are responsible for approving more than one department)
- The period for which you need to approve leave
- The status of your team's leave reports
- Clicking one of the bars will drill down into that specific status category
- Pending: The leave report has been submitted for approval and is awaiting approval
- Pending - In the Queue: If the queue has more than one approver and the leave report has not been approved by the person earlier in the queue than you, you will see the report as pending - in the queue
- In Progress: Your team member has started their leave report but has not yet submitted it for approval
- Returned: The leave report has been returned to your team member to revise and resubmit for approval
- Error: When a transaction has an error and goes into 'Error' status a message will be displayed to the user. The system will automatically return the transaction to the status it was in when it encountered the error.
- Pending - Approved: If the queue has more than one approver and the leave report has been approved by one person, but not the other, you will see the report as pending - approved.
- Approved: The leave report has been approved! You're done!
- Completed: Approved leave reports will move to a completed status at the end of a specified period

- Choose the status or category of leave reports that you would like to review and approve
- Click the bar chart to be taken to all reports with the same status or
- Scroll down to see the reports submitted by your team
- Preview the detailed leave report by clicking the ellipses and selecting preview

- An exclamation point means there is a warning - click to view warning
- The 'i' icon represents information - click to view when leave report was submitted and by whom
- From the preview, you can approve the time or return for correction

- Alternatively, if you do not need to preview the details you can select the check box beside your team member's name, and click 'Approve/Acknowledge'

- Checking off multiple team members will allow you to approve all leave reports
- Repeat these steps for multiple status' or team members if required
Viewing your team's leave balances
When approving the leave reports for your team members, you may want to confirm that they have sufficient hours available in that leave category.
- On the leave report approvals screen, scroll down to see leave reports submitted by your team members
- Click the ellipsis on the far right and select 'Leave Balance' from the drop down list

- The available leave balances for that employee will appear on screen

Proxy leave approvers
The employee self service leave approvals module allows a proxy to be set up to approve leave reports on behalf of an approver.
Allow someone to approve leave as me (proxy setup)
Add a proxy
- Access leave reports for approval via the employee services section of online tools. This link will take you to the new leave approval interface through the employee dashboard.
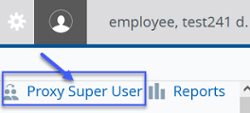
- To assign a proxy to approve employee leave reports on your behalf, click on 'Proxy Super User' at the top right of the screen
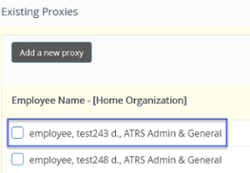
- Scroll down the screen to the 'Existing Proxies' section and click 'add a new proxy

- Click on the 'Select Employee to add as a Proxy' field and type in the name of the person to add as a proxy. Select the name in the search results.
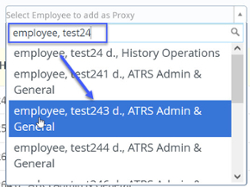
- The employee's name will now show in the list of existing proxies
- You can assign more than one proxy approver if required
- If you do not find the name of your proxy in the list, fill out the Human Resources System Access form
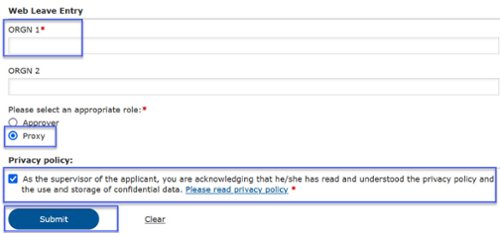
- Fill in the required contact information and check the box next to 'Web Leave Entry'

- Enter the org(s) and check the 'Proxy' and 'Privacy policy' boxes, then click 'Submit'
- Fill in the required contact information and check the box next to 'Web Leave Entry'
- Proxy set up is typically completed within 24 hours
Remove a proxy
- From the leave reports for approval screen, click on 'Proxy Super User' at the top right of the screen
- Scroll down to the 'Existing Proxies' section
- Check the box beside the name of the proxy you wish to remove
- Click 'Delete proxies'

- You will be asked to confirm that you want to remove the proxy. Click 'Yes' to confirm.

Approve leave for someone (act as a proxy)
Approve leave as a proxy
- From the leave reports for approval screen, click on 'Proxy Super User' at the top right of the screen
- Scroll down to the 'Act as a Proxy for' section
- Click on the drop down box in the 'Act as a Proxy for' section
- Select the name of the person on whose behalf you are approving leave reports

- Click 'Navigate to Time & Leave Approvals application' in the bottom right corner of your screen

- You will now see that you are in the leave report approvals screen and there is a message in the top right of your screen showing that you are acting as a proxy

Stop acting as a proxy
- From the leave reports for approval screen, click on 'Proxy Super User' at the top right of the screen
- Scroll down to the 'Act as a Proxy for' section
- Click on the drop down box in the 'Act as a Proxy for' section
- Select your name from the list
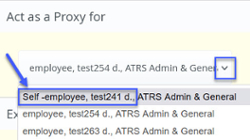
- Click 'Navigate to Time & Leave Approvals application' in the bottom right corner of your screen
- You will now see that you are in the leave report approvals screen and the message that you are acting as a proxy is gone